So, you’ve probably heard of Shrinky Dinks, right? It’s that magical craft project that lets you take a flat piece of plastic, draw on it, and then watch it shrink into a tiny masterpiece when heated up in the microwave. Shrinky Dinks in microwave is not just a fun activity for kids but also a creative outlet for adults who love DIY crafts. Imagine turning your doodles into cool little charms, earrings, or even mini art pieces. Sounds awesome, doesn’t it? Let’s dive into this world of shrinky awesomeness!
Before we get too excited, it’s important to know the basics. Shrinky Dinks have been around since the late 1970s, and they’re basically made from polystyrene plastic sheets. When heated, these sheets contract and harden, leaving you with a mini version of whatever you drew on them. The process is simple, but there’s a lot to learn if you want to master the art of shrinking. Stick around, because we’re about to break it all down for you.
Now, let’s talk about why Shrinky Dinks in microwave is such a big deal. It’s not just about shrinking plastic—it’s about unleashing your creativity. Whether you’re making personalized gifts, cool accessories, or just having fun with friends and family, Shrinky Dinks offer endless possibilities. Plus, they’re super affordable and easy to do at home. So, are you ready to shrink some plastic and make some magic? Let’s get started!
Read also:Down Syndrome Thug Unveiling The Myths And Building Understanding
What Are Shrinky Dinks?
Shrinky Dinks is a craft project that involves using special plastic sheets that shrink when heated. These sheets are usually made from polystyrene, which is the same material used in disposable cups and packaging. When you heat these sheets in the microwave, they shrink to about one-third of their original size while becoming thicker and more durable. The result is a tiny, hardened version of whatever you drew or printed on the plastic.
The concept of Shrinky Dinks was invented in 1973 by two sisters, Kim and Robert Foster. They originally called it "Krinkets," but the name was later changed to Shrinky Dinks. Since then, it has become a beloved craft activity for both kids and adults. The best part? You don’t need any special skills to create something amazing. All you need is a little imagination and a microwave!
How Do Shrinky Dinks Work?
Here’s the science behind it. Polystyrene plastic is made up of long chains of molecules that are stretched out when the sheets are manufactured. When you heat the plastic, these chains contract, causing the material to shrink. The shrinking process is what makes Shrinky Dinks so fascinating. As the plastic shrinks, it also becomes thicker and more rigid, which is why your designs end up looking so cool and durable.
Another interesting fact is that the shrinking process happens almost instantly. Once the plastic reaches the right temperature, it starts to curl up and then flattens out again as it cools. This quick transformation is what makes Shrinky Dinks so fun to watch. Who knew science could be this entertaining?
Why Use Shrinky Dinks in Microwave?
Using a microwave to shrink your Shrinky Dinks is one of the easiest and most convenient methods. Unlike ovens, which require more time and attention, microwaves provide quick results with minimal effort. Plus, most households already have a microwave, so you don’t need to invest in any extra equipment. Just pop your Shrinky Dinks in, hit the button, and voila! You’ve got yourself a mini masterpiece in no time.
Another advantage of using a microwave is that it allows you to control the shrinking process more precisely. You can stop the microwave at any point to check on your Shrinky Dinks and make sure they’re shrinking evenly. This is especially useful if you’re working with larger or more complex designs. Just remember to use microwave-safe materials and follow safety guidelines to avoid any mishaps.
Read also:Ella Wilkins The Rising Star Of Modern Entertainment
Benefits of Shrinky Dinks in Microwave
Here are some of the key benefits of using Shrinky Dinks in microwave:
- Speed: Microwaves heat up quickly, so you can shrink your designs in just a few minutes.
- Convenience: Most people already have a microwave at home, so there’s no need to buy additional equipment.
- Control: You can pause the microwave at any time to check on your Shrinky Dinks and ensure they’re shrinking properly.
- Fun Factor: Watching the plastic shrink and curl up in the microwave is super entertaining, especially for kids.
Materials You’ll Need for Shrinky Dinks in Microwave
Before you start shrinking, you’ll need to gather a few essential materials. Don’t worry, they’re all easy to find and affordable. Here’s what you’ll need:
- Shrinky Dinks plastic sheets (you can buy these online or at craft stores)
- Pencils, markers, or permanent pens for drawing or coloring
- A hole punch for adding holes to your designs (optional)
- A microwave-safe plate or tray to place your Shrinky Dinks on
- A microwave-safe tool or spatula for handling the hot plastic
Once you have all your materials ready, you’re good to go. Just remember to work in a well-ventilated area and keep an eye on the microwave while your Shrinky Dinks are shrinking. Safety first, folks!
Where to Buy Shrinky Dinks Supplies
You can find Shrinky Dinks supplies at most craft stores, department stores, or online retailers like Amazon. Look for kits that come with plastic sheets, markers, and other accessories to get you started. If you’re feeling adventurous, you can even use old CD cases or similar polystyrene materials as a budget-friendly alternative. Just make sure they’re clean and free from any scratches or imperfections.
Step-by-Step Guide to Making Shrinky Dinks in Microwave
Now that you have all your materials ready, let’s walk through the process of making Shrinky Dinks in microwave. Follow these simple steps to create your own mini masterpieces:
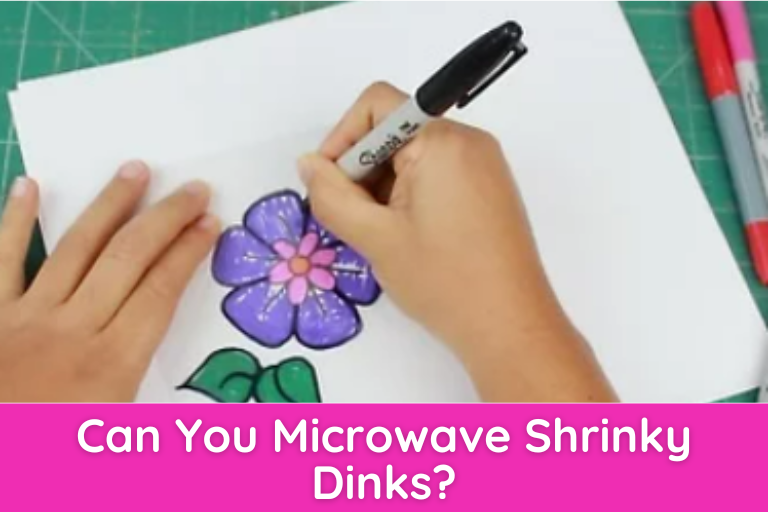
Step 1: Start by drawing or coloring on your Shrinky Dinks plastic sheet. Use pencils, markers, or permanent pens to create your design. Keep in mind that the final product will be about one-third of the original size, so make sure your design is detailed enough to show up clearly.
Step 2: Cut out your design using scissors or a craft knife. If you want to add holes for hanging, use a hole punch to create them before shrinking. This will ensure the holes are the right size after the plastic shrinks.
Step 3: Place your Shrinky Dinks on a microwave-safe plate or tray. Make sure they’re not overlapping, as this can affect the shrinking process. You can also use a piece of parchment paper to prevent the plastic from sticking to the plate.
Step 4: Put the plate in the microwave and set it to high for about 1-2 minutes. Keep an eye on the Shrinky Dinks as they start to shrink and curl up. Once they flatten out and stop moving, they’re ready to be removed from the microwave.
Step 5: Carefully remove the plate from the microwave using oven mitts or a towel. Let the Shrinky Dinks cool down for a few minutes before handling them. Once they’re cool, you can add any finishing touches, like painting or gluing them onto accessories.
Tips for Perfect Shrinky Dinks
Here are a few tips to help you achieve the best results with your Shrinky Dinks:
- Use light-colored markers for better visibility after shrinking.
- Don’t overload the microwave—shrink one or two pieces at a time for even results.
- Experiment with different designs and patterns to see what works best for you.
- Let the Shrinky Dinks cool completely before touching them to avoid warping.
Common Mistakes to Avoid
While Shrinky Dinks in microwave is a fun and easy activity, there are a few common mistakes that can ruin your designs. Here’s what to watch out for:
- Overheating: Microwaving for too long can cause the plastic to burn or become too brittle. Stick to the recommended time and check frequently.
- Uneven Shrinking: If your Shrinky Dinks aren’t shrinking evenly, try rearranging them on the plate or using a lower power setting.
- Using the Wrong Plastic: Not all plastics are suitable for shrinking. Stick to polystyrene or Shrinky Dinks-approved materials to ensure the best results.
By avoiding these mistakes, you’ll be able to create flawless Shrinky Dinks every time. Practice makes perfect, so don’t be afraid to experiment and find what works best for you.
How to Fix Shrinky Dinks Mistakes
Mistakes happen, but don’t worry—there are ways to fix them. If your Shrinky Dinks come out warped or uneven, you can try reheating them in the microwave for a few seconds to flatten them out. You can also use sandpaper or a nail file to smooth out any rough edges. And if you’re not happy with the design, you can always start over and try again!
Creative Ideas for Shrinky Dinks in Microwave
Now that you know how to make Shrinky Dinks, let’s talk about some creative ways to use them. The possibilities are endless! Here are a few ideas to get you started:
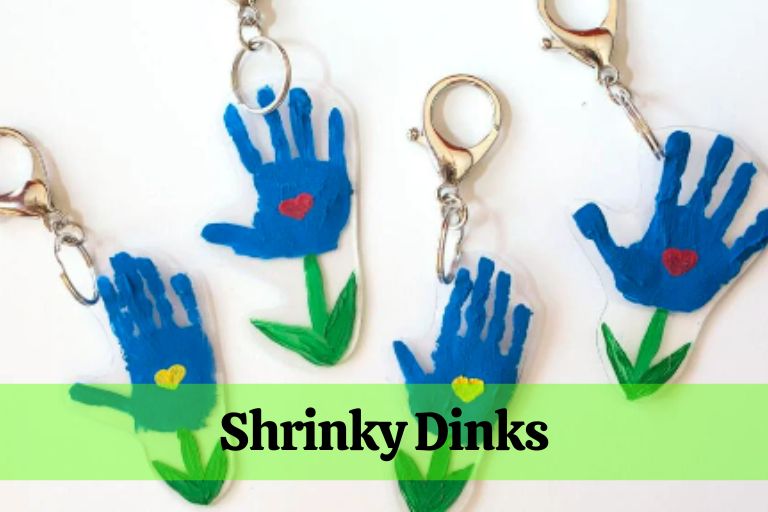
- Custom Earrings: Create unique and personalized earrings by adding holes and attaching earring hooks.
- Keychains: Add a keyring to your Shrinky Dinks for a fun and functional accessory.
- Mini Art Pieces: Frame your Shrinky Dinks and display them as tiny works of art.
- Gift Tags: Use Shrinky Dinks to make custom gift tags for birthdays or holidays.
Let your imagination run wild and see where your creativity takes you. Who knows? You might just discover your new favorite hobby!
Shrinky Dinks for Kids
Shrinky Dinks in microwave is a fantastic activity for kids. It encourages creativity, fine motor skills, and patience. Plus, it’s a great way to spend quality time together as a family. Just make sure to supervise young children when using the microwave and handling hot plastic. With a little guidance, kids can create their own unique Shrinky Dinks designs and have a blast doing it.
Conclusion: Get Shrinking!
Shrinky Dinks in microwave is a fun, easy, and affordable craft project that anyone can enjoy. Whether you’re a kid or an adult, there’s something magical about watching a flat piece of plastic transform into a tiny masterpiece. With a little creativity and some practice, you can create all sorts of cool designs and accessories. So, what are you waiting for? Grab your materials and start shrinking!
Don’t forget to share your Shrinky Dinks creations with friends and family. You might even inspire others to try it out for themselves. And if you have any questions or tips, feel free to leave a comment below. Happy shrinking, and see you in the next craft adventure!
Table of Contents
- What Are Shrinky Dinks?
- How Do Shrinky Dinks Work?
- Why Use Shrinky Dinks in Microwave?
- Materials You’ll Need for Shrinky Dinks in Microwave
- Step-by-Step Guide to Making Shrinky Dinks in Microwave
- Common Mistakes to Avoid
- Creative Ideas for Shrinky Dinks in Microwave
- Shrinky Dinks for Kids
- Conclusion: Get Shrinking!